
In the last couple of days I get a lot of question how to move Azure VMs between regions. So I decided to write a blog post about this question. First of all it is really important to understand which topics this article covers and which not.
To understand the article right, keep the follow settings in mind:
- This article will cover how to move Azure VMs between global regions with ASR
- Global regions mean all the standard available regions
- This article doesn´t cover the movement between Azure Global and Azure Germany, Azure Governance or China
- For moving Azure VMs from Azure Germany to Azure Global there there is planned to write an additional article
- For a general movement of Azure resources (SQL databases, Web Apps and more) a futher post will follow
This article focuses on how to move Azure VMs between Azure global regions using Azure Site Recovery (ASR). Another article will focus on how to move other Azure resources between regions.
Contents
General
To move Azure VMs between different global regions with ASR there are some requirements needed:
- Azure subscriptions are allowed to create Azure VMs in the target regions
- User rights to create the Azure ressources (Azure VMs, VNETs, NICs, etc.)
- Install latest updates on Windows/Linux OS
- Check that the VM has Internet access without Proxy or Firewall between VM and Internet
- When there is a firewall or proxy in place, check the needed requirements
- Configure the VNET and Subnet in the target destination before move the VM to a different region
The process to move Azure VMs between different Global regions is straight forward. But don´t forget, all related management tasks to the VM, like Backup, Log analytics Workspace, Start Stop Runbooks will be lost after the migration.
Start VM replication with ASR
We need an Recovery Service Vault (RSV) for Azure Site Recovery (ASR), because ASR is integrated in the RSV. First I recommend to create a separate Resource group and a separate RSV for the movement tasks.
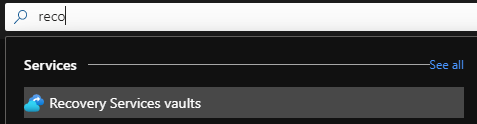
Then create a Recovery Service Vault (type “recovery” in the search bar).
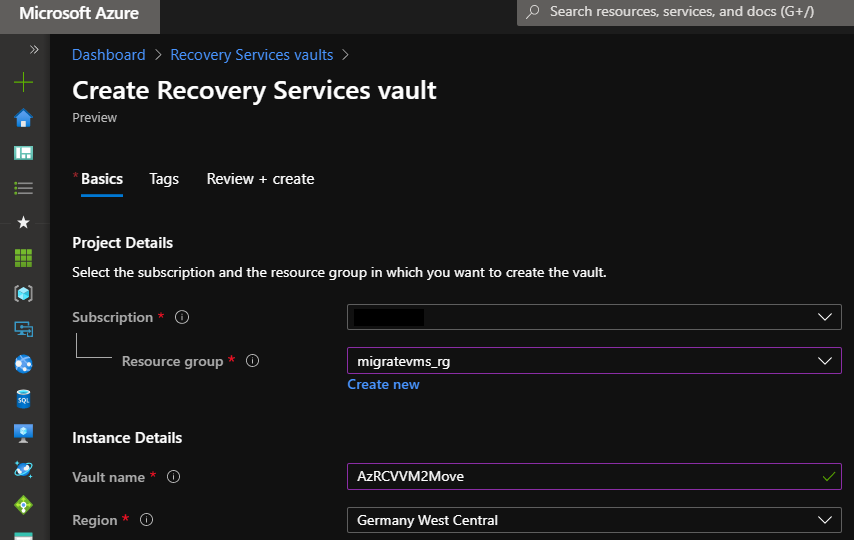
Create the Recovery service vault (RSV) and choose the subscription in which the planned VMs exist and select the created resource group. Place the RSV in the target region.
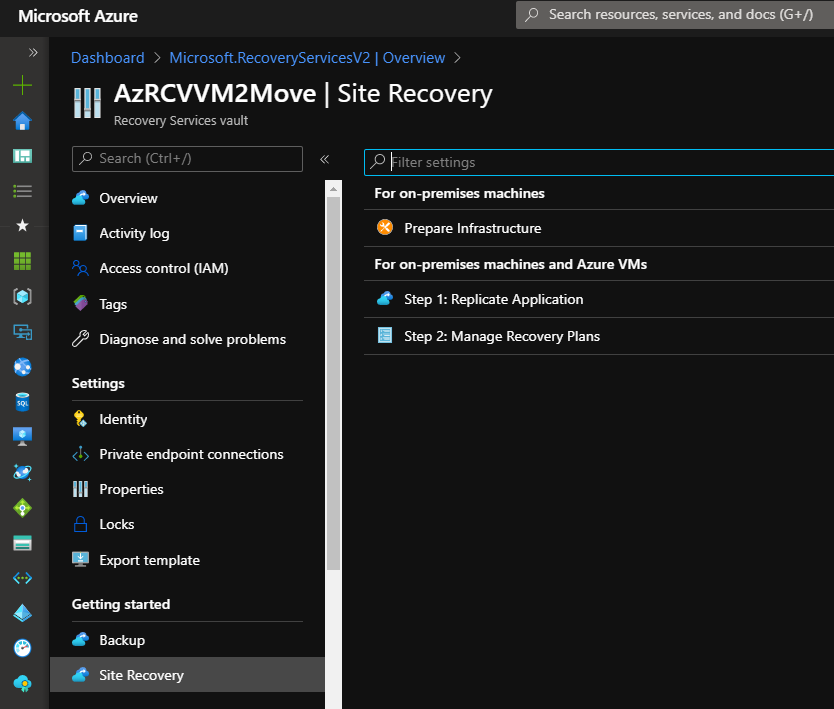
Navigate to the newly created RSV and select “Site recovery” under “Getting started”. In the new blade select “Step 1: Replicate Application”.
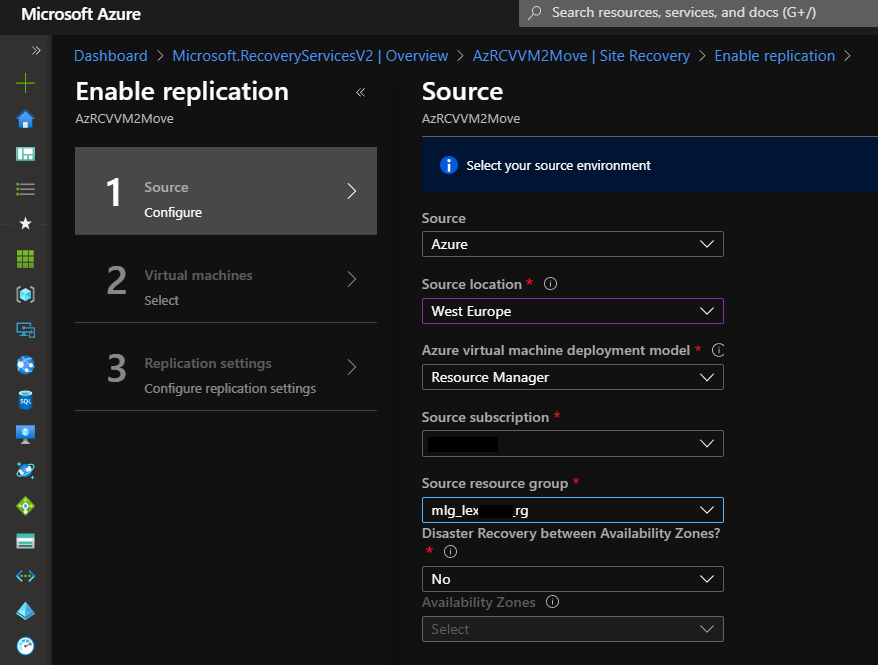
Here we can select the VM for the planned movement. Select the source and the resource group in which the VM actually located.
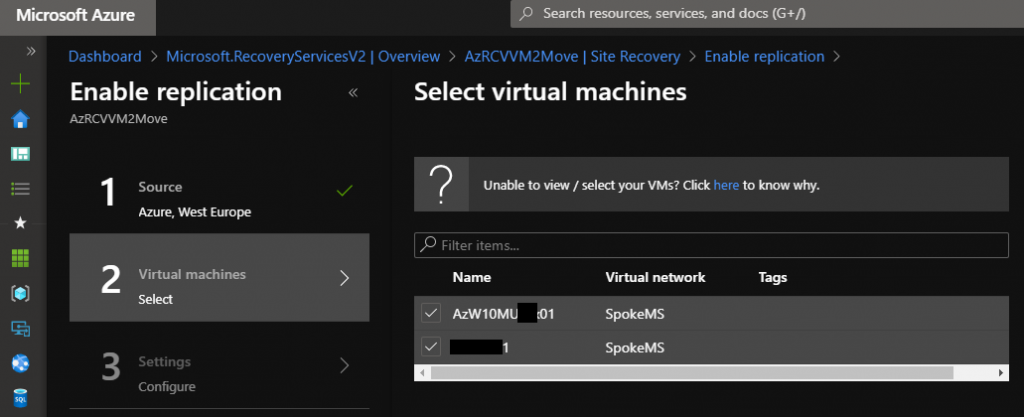
In “Select virtual machines” we get the list of the available VMs in the selected resource group. Choose one or all VMs that are planned for movement.
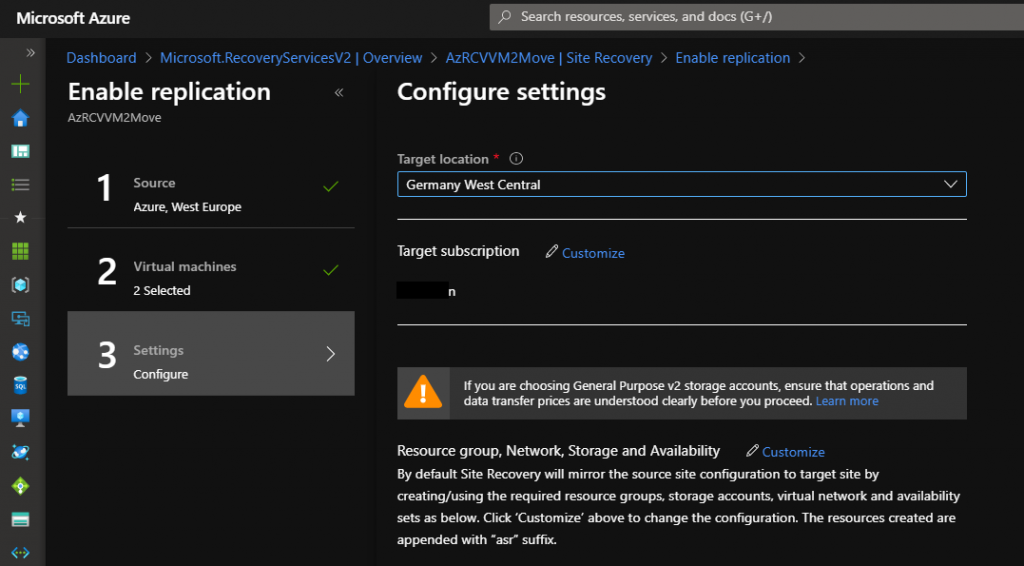
Then we reach the “Enable replication” blade. Here configure the target region for the VM.
Plese note: The point customize let you select a different target subscription for the VM.
Select the point “Customize” behind “Resource group, Network, Storage and Availabilty”.
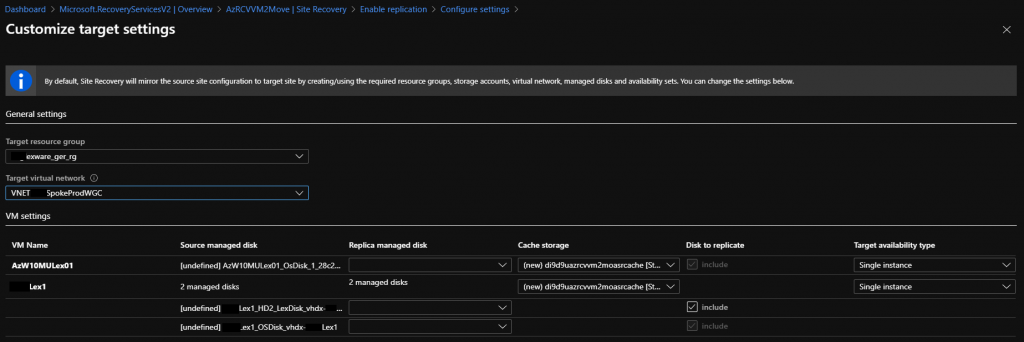
Configure the target resource group and the target virtual network here. The selection of the target subnet is not possible, ASR searches for a subnet with the same name, if no subnet with the same name is available, it is placed in the first existing subnet in the selected VNET.
Please note: ASR replicates the data from the source to the target region. The data is stored in a storage account in the target region. We can select different disks (of different type and speed) in the target region for the selected VMs, since the new disks are only created after the initialization of the site replication.
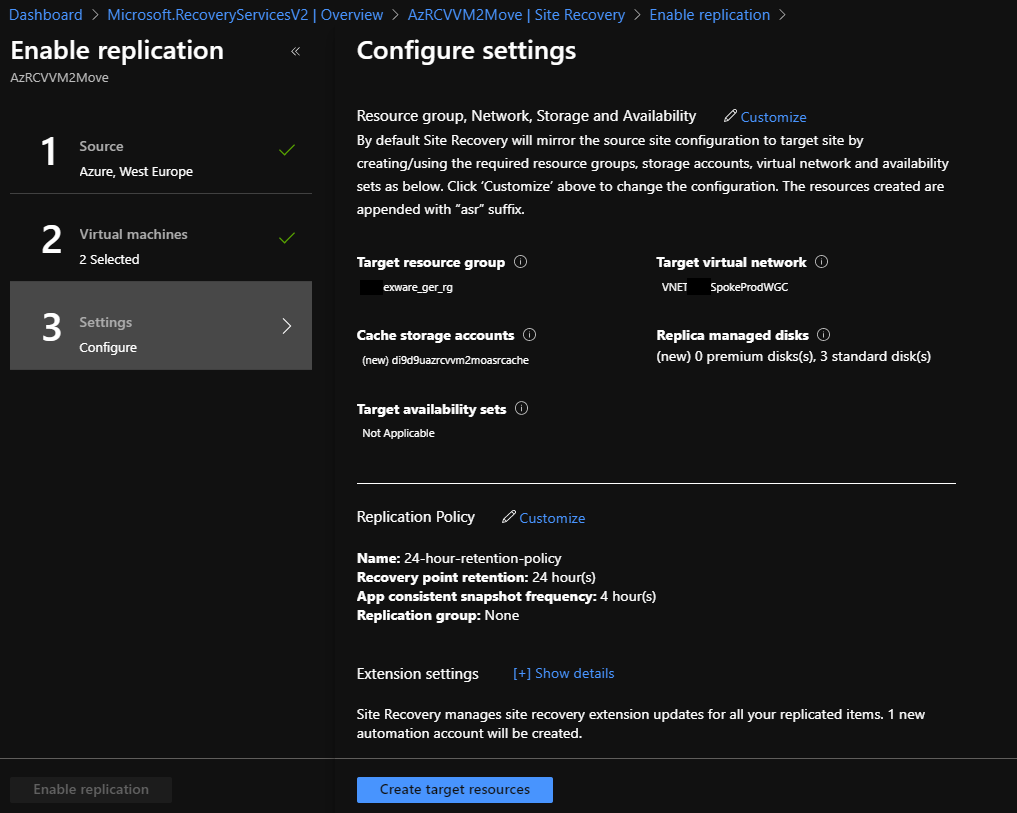
The replication policy can remain unchanged, because in this case we use ASR only to move the VM between different regions. When we configure ASR for failover and disaster recovery, then we have to configure the replication policy for our needs.
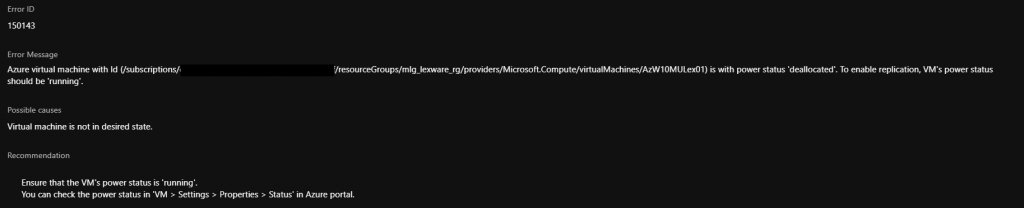
Please note: The VM must be turned on and available for ASR to successful start the replication.
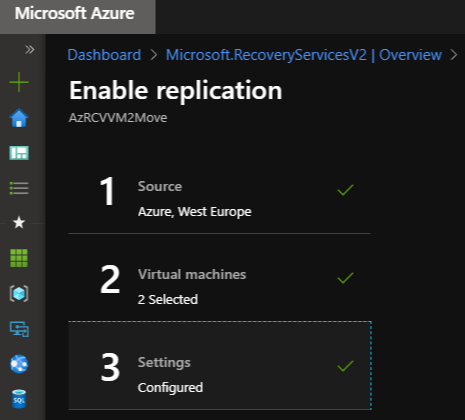
Now start the replication process with a click on “Enable replication”.
Once we have started replication of the selected VMs, it takes a while for Azure to start replication and complete all related tasks to replicate all data to the selected target region.
Move the Azure VMs to target regions
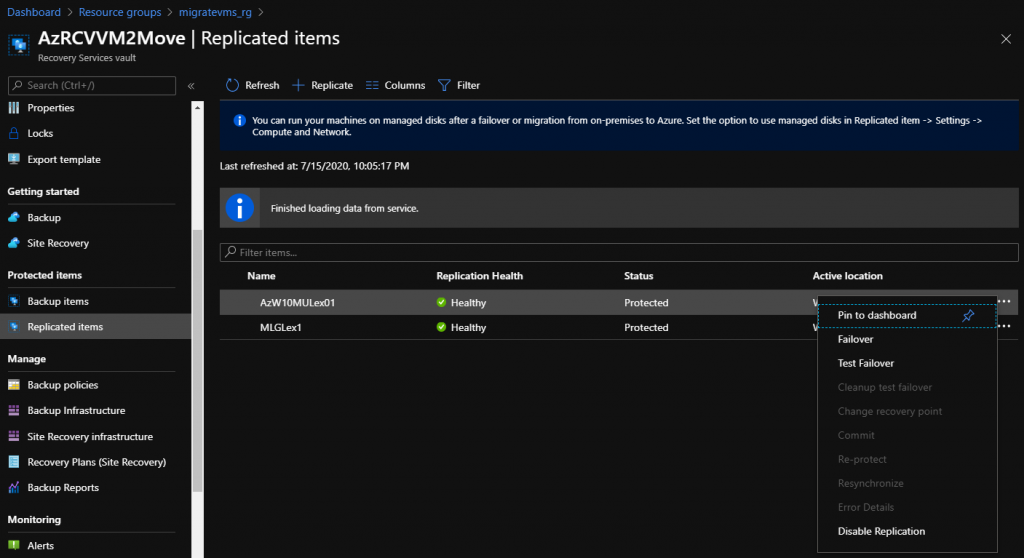
After we successfully start the replication process, all data from the selected VMs will be replicate to a storage account in the target region. We can see the replication status by going to “Replicated items” under “Protected items”.
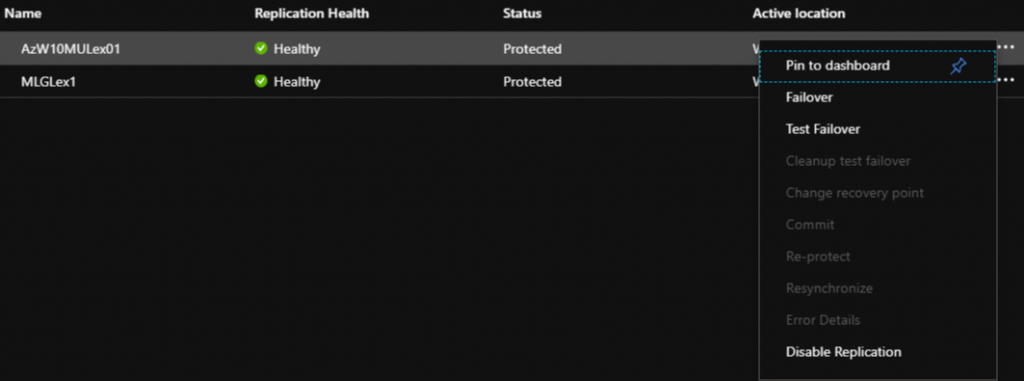
In this blade we see all VMs they are in an ongoing replication with the selected RSV. On the right site we see three dots – please select a VM and click on the three dots. Now we get an additional menu with different options for the selected VMs.
Please note: We can do a Test failover to check if the VM will be available in the target region. But for a Test failover we need a Test VNET and this must have no connection to my productive environment.
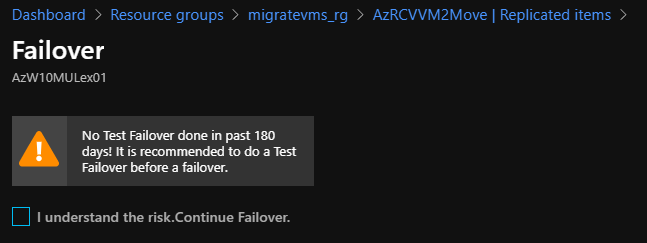
Select Failover and we get a notify when we doesn´t take a Test failover. Confirm the warning or think about a Test failover.
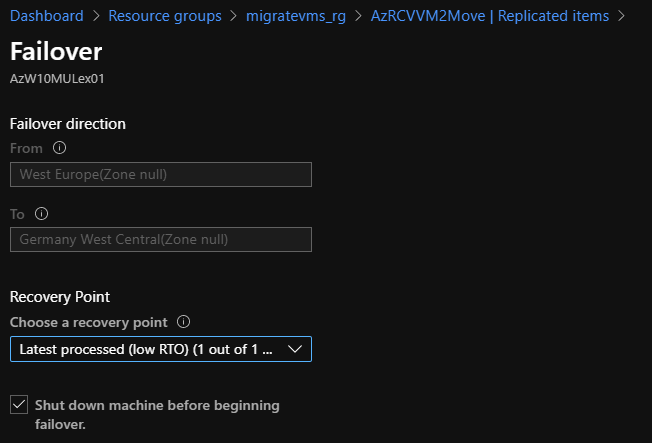
Now we see a Menu that shows us the source and the target destination. Select the latest recovery point for the Failover and Check the box “Shut down machine beginning failover”. This will shutdown the VM in the old region and replicate all latest data to the VM in the new region.
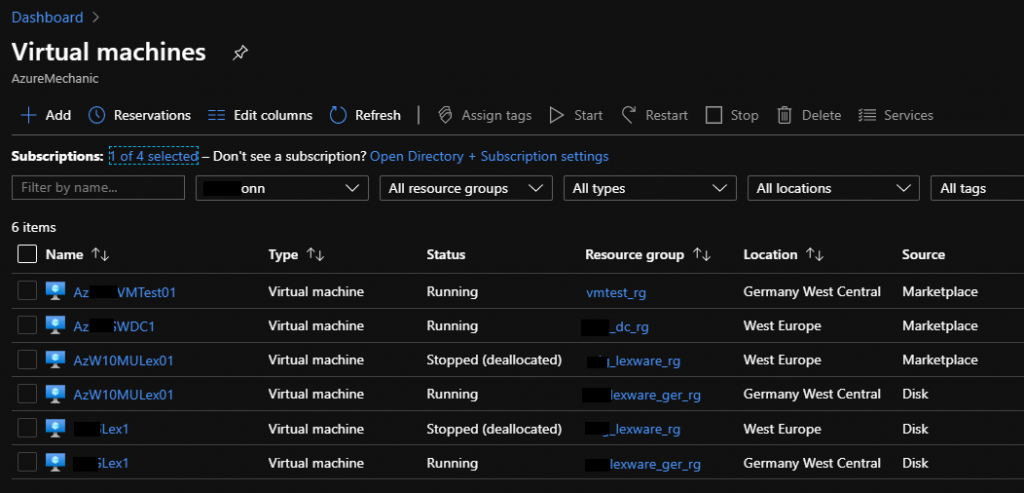
With the enablement of the failover we can switch to the Virtual Machine overview and see, in this case, two new server up and running with the same name in the new region.
Please note: Do not start the old server to avoid effects on your environment.
Finish the move and clean up
Now we have finished the move of the Azure VMs between Global regions. But we have to consider some steps to finish the process and clean up the old ressources.
Commit the changes to ASR
First take a look at the new VMs and check if everything is working properly and all data is available. Then go back to the RSV and to the replicated items overview. Here we see the actual status of the finished VMs. Click on the three dots on the right site of the VM and select “Commit“.
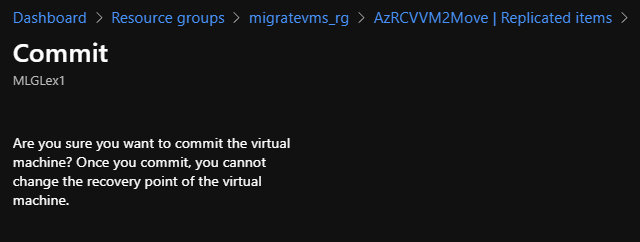
Now we get a hint that we can not change the recovery point of the VM.

The Commit brings up another information that the current replication will be disable and all replicated items will be removed. This cleans up the existing RSV and delete all connection betwen the old and the new VM.
Delete the old Azure VMs
To avoid side effects to the production environment delete the old Azure VMs. Also don’t forget to delete the public IPs, NSGs and other resources that refer only to the specified VM.
Reconfigure VM backup
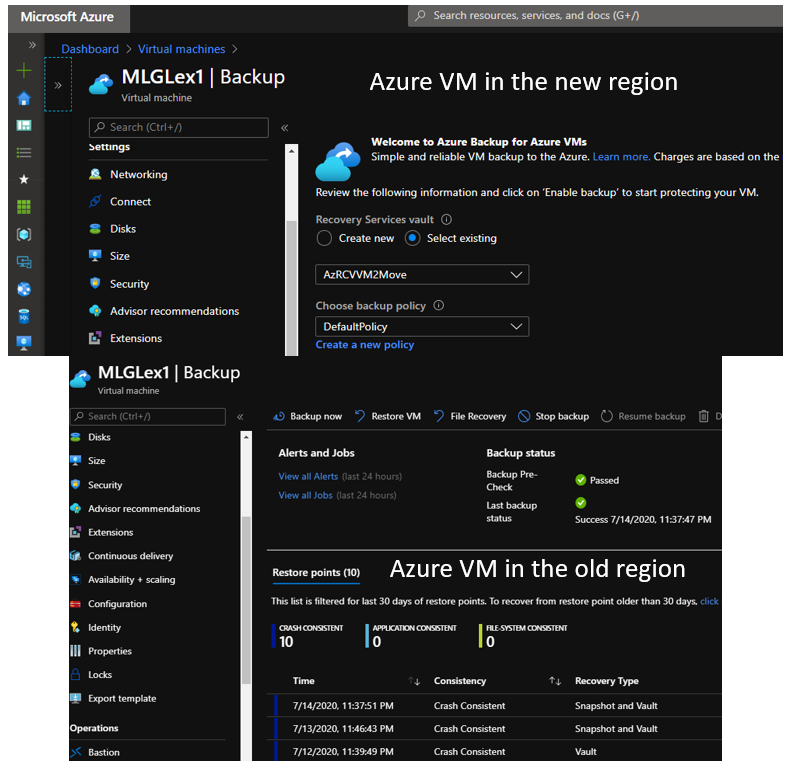
When the old VM has backup in place (and I recommend to use Azure Backup for production VMs) keep in mind that with the move of the Azure VM, the existing connection between Azure Backup and the Azure VM doesn´t exist any more. We have to enable and configure Azure Backup again for the VM with an RSV in the new region. Keep this in mind, to avoid data loos.
Finishing
This step completes the move of our Azure VMs between global regions. As you can see, the process with ASR is quite simple, but the devil is in the details. Before start the move, you must plan the exact VNET design and after the move you have to configure the additional steps like backup, automation, update management, log analytics and so on to complete the movement successful.
If you have a question, please leave a comment or contact me via Twitter.